How to change comment box style with CSS - My Widget House
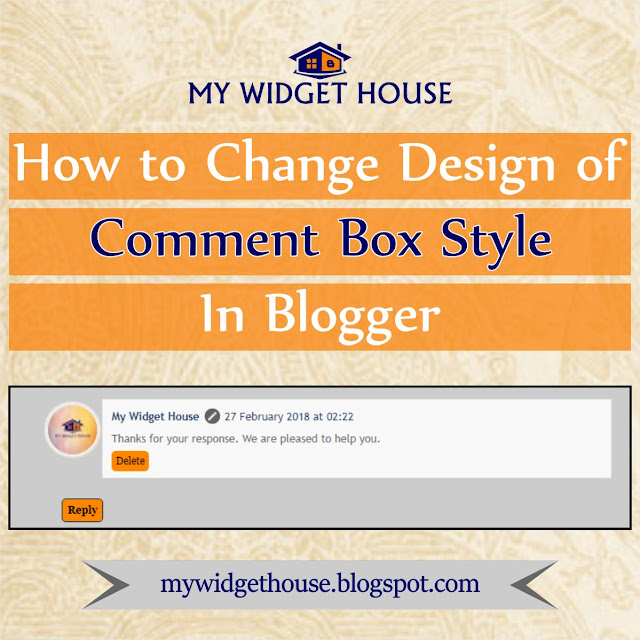
Hi guys I am here today with the great article. Every blogger wants to the best design to his readers. And if you are looking to change the design of your comment box. Then you are at the right place because I am going to tell you that how you can edit your comment box.
As the default comment box don't give the good impression to the readers. Because of its shape and colours, it looks like an old design. But we all know that we and our readers like the latest designs with the beautiful colours.
Also if your blog's colour scheme is different from your comment box's colour. Then it is also the waste of our hard work due to its look. As my blog has orange colour scheme with dark blur. So, I have configured my blog's comment box with the orange colour. And also the picture of the visitor shows in a circle with his comment.
So, lets take start to innovate our comment box. And make it possible to attract more visitors in our website.
How to Change Comment Box Style with CSS
As being a professional blogger we know that it is very time saving to work with CSS. So, to add the CSS of the new innovative comment box just follow these very simple steps:
Step 1
Sign In to your Blogger Account
Step 2
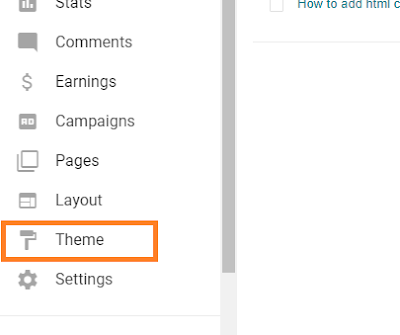
Select the Theme in left side bar of your Blogger Dashboard. As shown in picture belowStep 3
Now click on the orange Customize button as marked in the picture below.Step 4
Now you are in the Customizing dashboard of your blog. Click on Advanced menu and then click on Add CSS menu at the end of these menus. As shown in the picture below
Step 5
Copy the code from the following box. And paste it into your CSS box.
.comments h4
{color:#ffffff;display: inline-block !important;background:#3BB7D9;padding:10px;}.comments .comment .comment-actions a {background:#3BB7D9;border-radius: 5px;color: #ffffff;font:12px georgia;margin-right: 8px;padding:5px;text-decoration: none !important;
}
.comments .comment-block {background:#f8f8f8;border: 1px solid #f0f0f0;padding: 10px;}.continue{border-top:none !important;}.continue a {background:#3BB7D9;border: 1px solid #3BB7D9;border-radius:5px;color: #ffffff;display: inline-block !important;margin-top: 8px;padding:5px;text-decoration: none !important;font:12px georgia ,arial;}
.comment-header a {
color: #222222 !important;}
#comments .avatar-image-container img {border:2px solid #f0f0f0;border-radius: 50px 50px 50px 50px;height: 58px;max-width: 58px;}
.comments .avatar-image-container {border: 2px solid #FFFFFF;border-radius: 34px 34px 34px 34px;box-shadow: 1px 1px 3px #dcdcdc;float: left;margin-left: -20px;max-height: 61px !important;overflow: hidden;width: 61px !important;}
Now you have entered the code in the CSS box of your blog. The default theme from this code will be appear in Blue colour. And if you want to customize it in your own colour just change the following things w.r.t colours.
- Change #3BB7D9 color Background
- Change Comment Counter Color.
- Change Comment Sender Reply button
- Change Comment (message) Section Background
- Add a Line in Between Replies Reply & Add Comment Button
- Change in Replies Reply Button & Add Comment.
- Change Comment Sender Name & Date
- Change Comments Avatar Image Size
- Change Comment Avatar Images Shape & Border
- If you Change Avatar Image in Square then Change All Radius Value “0”
Now you are all done with your CSS code.
Step 6
After changing all colour codes to your own codes. Clik on the orange Apply to Blog button in top right corner of your blog. Your blog is now with the great comment box. Enjoy the new look!


Are you looking to design your blog? Or to add any widget in your blog?
ReplyDeletewe provide you the solution of your this problem just only in a single platform.
You can visit our website for all details: mywidgethouse.blogspot.com
Or directly go on the particular topic below:
1. How to add html code box in blogger post?
https://mywidgethouse.blogspot.com/2018/02/how-to-add-html-code-box-in-blogger-post.html
2. How to Change Text Selection Colour in Blogger?
https://mywidgethouse.blogspot.com/2018/02/how-to-change-text-selection-colour-in.html
3. How to Add Page Number Navigation in Blogger?
https://mywidgethouse.blogspot.com/2018/02/how-to-add-page-number-navigation-in.html
4. How to change comment box style with CSS?
https://mywidgethouse.blogspot.com/2018/02/how-to-change-comment-box-style-with.html
5. How to add weather widget in blogger?
https://mywidgethouse.blogspot.com/2018/02/how-to-add-weather-widget-in-blogger-my.html
6. How to add a Facebook Like Box in blogger?
https://mywidgethouse.blogspot.com/2018/02/how-to-add-facebook-like-box-in-blogger.html
7. How to Customize Read More Button in Blogger?
https://mywidgethouse.blogspot.com/2018/02/how-to-customize-read-more-button-in.html
8. How to Change Powered by Blogger Footer Attribution from a Blog?
https://mywidgethouse.blogspot.com/2018/03/how-to-change-powered-by-blogger-footer.html
9. How to Change Scroll Bar Style in Blogger?
https://mywidgethouse.blogspot.com/2018/03/how-to-change-scroll-bar-style-in.html
10. How to Add Favicon in Blogger?
https://mywidgethouse.blogspot.com/2018/03/How-to-Add-Favicon-in-Blogger-My-Widget-House.html
11. Add social share buttons in blogger
https://mywidgethouse.blogspot.com/2018/03/add-social-share-buttons-in-blogger-my-widget-house.html
12. How to remove subscribe to post atom and subscribe to post comment from blog?
https://mywidgethouse.blogspot.com/2018/03/How-to-remove-subscribe-to-post-atom-and-subscribe-to-post-comment-from-blog-My-Widget-House.html
13. How to Enable or Disable Comments in Blogger Posts or Page?
https://mywidgethouse.blogspot.com/2018/03/How-to-Enable-or-Disable-Comments-in-Blogger-Posts-or-Page-My-Widget-House.html
14. Eligibility Criteria of Google Adsense for Blogger?
https://mywidgethouse.blogspot.com/2018/03/eligibility-criteria-of-google-adsense.html
15. How to center Blogger Pages Menu?
https://mywidgethouse.blogspot.com/2018/03/How-to-center-Blogger-Pages-Menu-My-Widget-House.html
16. How to add related post widget in blogger post?
https://mywidgethouse.blogspot.com/2018/03/How-to-add-related-post-widget-in-blogger-post-My-Widget-House.html
17. How to add jump break or read more link in blogger post?
https://mywidgethouse.blogspot.com/2018/03/How-to-add-jump-break-or-read-more-link-in-blogger-post-My-Widget-House.html
It’s very excellent information and more real facts to provided that post.Thank you for sharing this information. aviation website development
ReplyDelete